Yggdrasil
My first custom keyboard, 36% layout
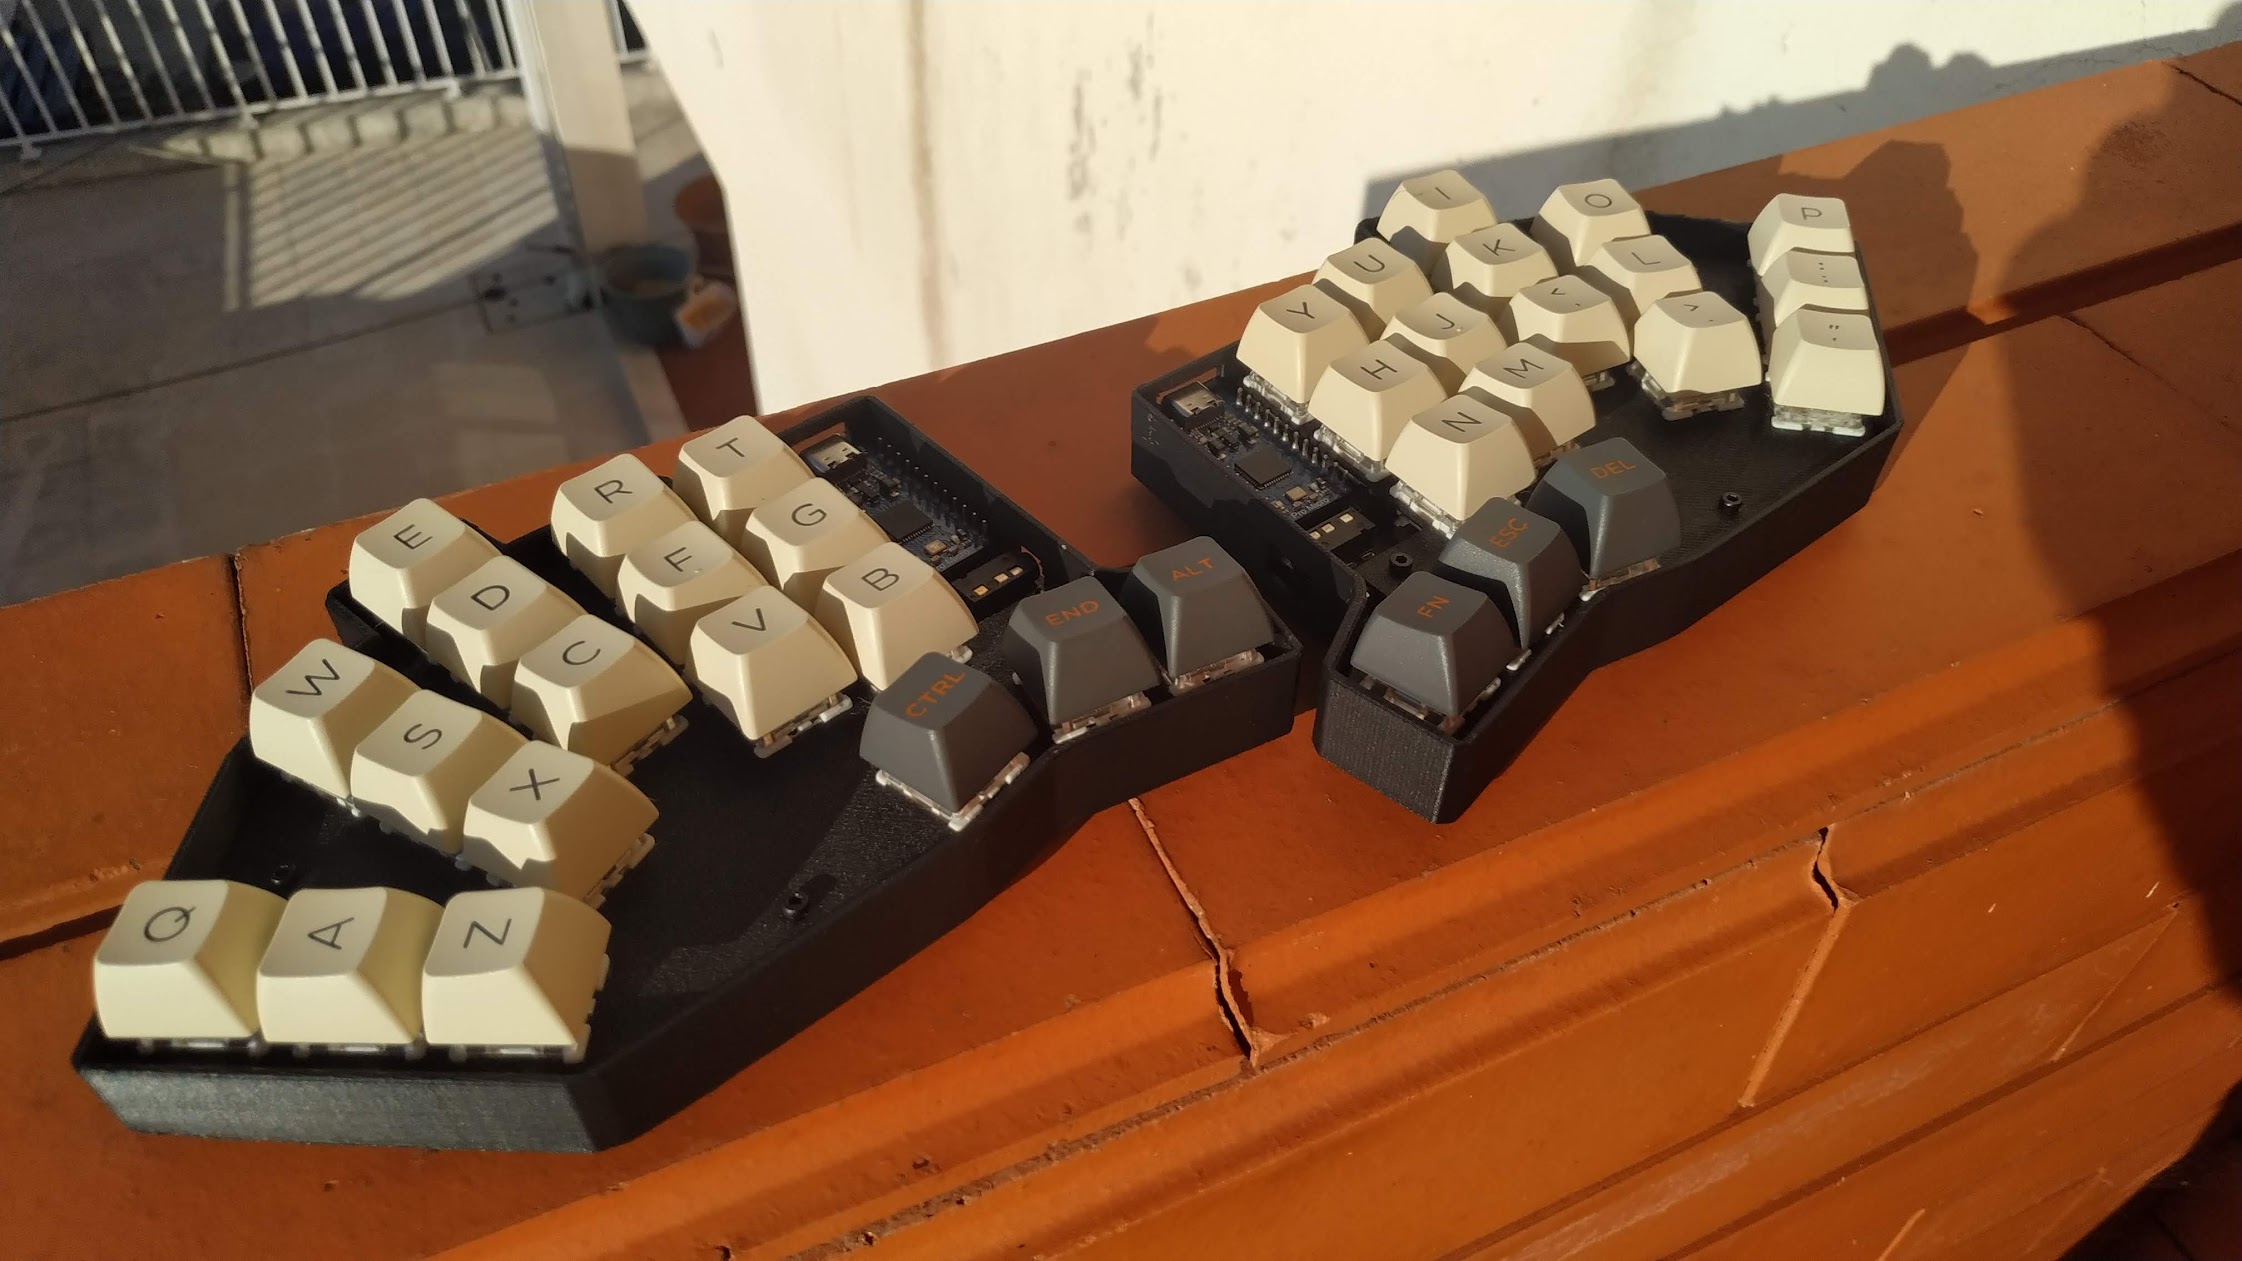
Table of Contents #
Feel free to jump to another section of the article!
- The Split
- Beginning of the journey
- Decisions
- Key disposition
- Keys
- Designing
- Total cost
- Final thoughts
- References
The Split #
Split keyboards have always been at the top when it comes to ergonomics, and with designing and creating a board being easier now than ever, more and more people are trying their luck at creating such boards based on their ideas and tastes.
Beginning of the journey #
The first time split/ergonomic keyboards piqued my interest was when I first watched ThePrimeagen’s video, My workflow using Vim, 2021, where he uses a split keyboard know as the Dactyl. I went to see his other videos and was so astounded with his speed and how the keyboard looked that I just had to find out more about these sort of keyboards.
And so, after watching some split keyboard videos, I found another channel on YouTube which had keyboard content more geared towards ergonomics. The channel in question is Ben Vallack’s and in there he goes into several rabbit holes about the ergonomics of keyboard layouts such as Colemak DH as well as the keyboards themselves, such as using an ortholinear keyboard, a split keyboard with 72 keys and then slowly tinkering down the number of keys and see what benefits that gets you.
So far so good and little ol’ me was just looking at these things purely for how they looked so unique and different from everything I’d seen. But then I stumbled upon a video guide detailing how to design and make your custom keyboard, and that’s when the thought popped into my mind, that this doesn’t really seem that difficult. So I started the process of creating my very first, split, keyboard with 36 keys (on each hand).
Decisions #
Key disposition #
The first thing I had to decide was how the layout was going to be and how many keys I wanted. I looked into another of Ben’s video in which he has this section in which he paints his fingers and sees how they span. So I tried it myself and I got this result:
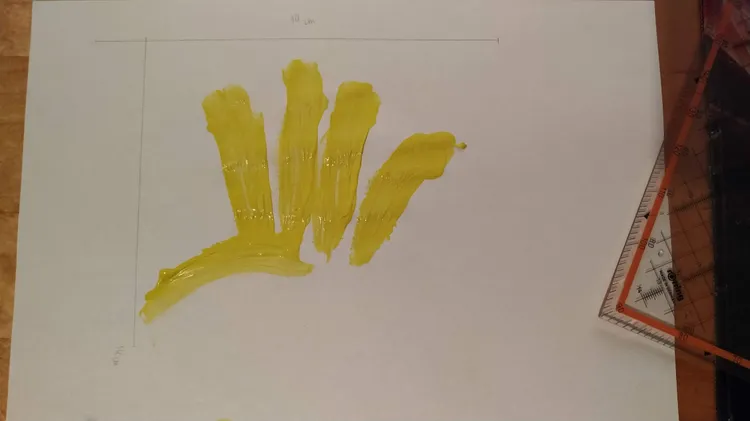
I made some rough measurements so I had some idea of the dimensions of the keyboard.
With this I knew that I wanted some finger span and also column stagger (which is when the columns are of different heights).
And the last decision that is left, other than the final key layout with layers, is the number of keys.
Keys #
To find out how many keys I was again looking through some split keyboard videos and found another great one about why use a split keyboard. But the part that pertained to key numbers and benefits states that with a 30% (minus thumb keys) each finger won’t be more than one key away from another. For example, say that your fingers are resting in the home row and you wan’t to type a number. With regular keyboard, you can’t just touch the key around it in any direction and have it output a number, without any extra configuration at least. But with a split keyboard this is possible. Because of this, I had made my decision to go forward with a 36% layout. That is 30 keys plus 3 keys in the thumb cluster.
Designing #
The design part was done without being too strict about measurements (although if I do another in the future I’d like for it to be more strict about that). That is, some part of the design was done by “looks good” or like we say here in Portugal, a olhómetro.
I started with using Ergogen but couldn’t figure out how to make that work so I just used it to get a rough shape for the layout.
After that I moved into Kicad, wiring up the circuit for the micro-controller, all the switches and other components. For reference I looked at Lily58 and Corne schematics.
It shows how the switches, diodes and micro-controller are connected. Besides that, it also shows the connections for the reset button and the trrs jack. Here’s how it looks:

Then with this schematic you go into the PCB designer of kicad and there you will have the footprints (which are sort of blueprints for certain components) unorganized.
My goal here is not to teach how to design/wire up the PCB. There are great guides out there, I’d say that ai03’s is a good place to look around. Other links that I find useful will be in the references section of this article. Having said that, here’s how my board looked once it was all connected.

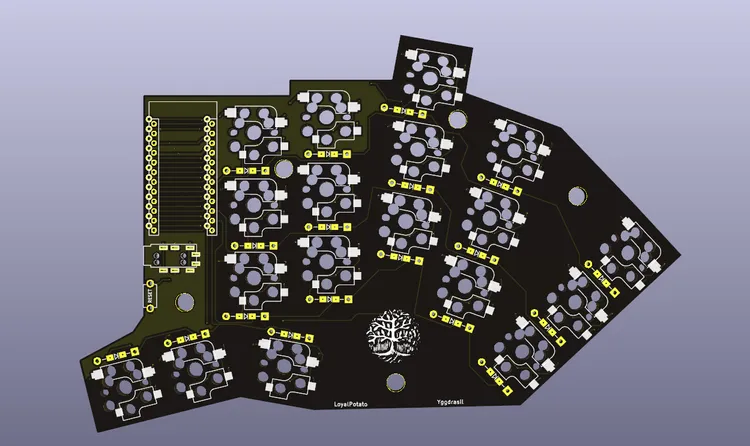
The 3d view of the same PCB, in Kicad:
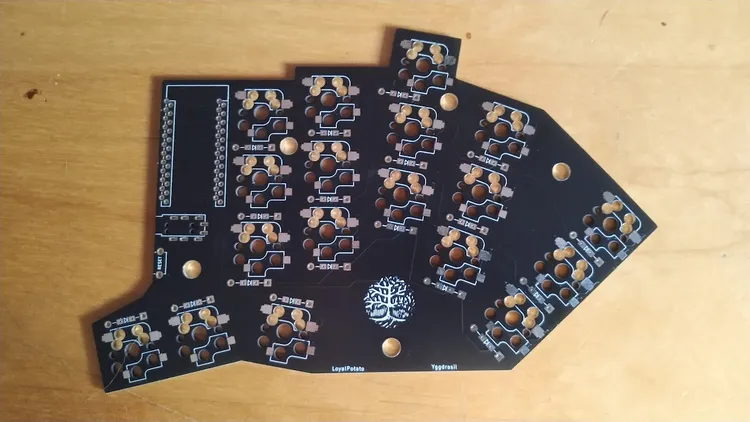
And finally the physical PCB, ordered from JLCPCB, but there are many others out there as well:
For the assembly of this board, you can go to the Yggdrasil repository for the build guide. It goes in depth for every step necessary to assemble the keyboard, from soldering to flashing the micro-controller.
Total cost #
I’ll leave here how much I spent for all the parts, minus the tools, such as soldering iron. If you’d like links for some of these parts, then you can go to my build guide in the parts section.
Some notes about the prices:
- Some of these items are bought in bulk, like the diodes, so this is just a price for the specific number of parts required
- The items don’t include shipping
- The price includes the VAT for Portugal so it may vary when you go check
| Parts | Price |
|---|---|
| PCB x2 | €5.13 |
| USB-C ProMicro x2 | €15.76 |
| TRRS Jacks x2 | €0.04 |
| Kailh Sockets x36 | €6.21 |
| Diodes x36 | €0.47 |
| Tact Switch x2 | €0.04 |
Also, as I had a 3d printer, I was able to print the plates. Because of that, I did not include it in the price table and total. The same goes for switches and keycaps, it’s expected that you will have these already or intend to buy them.
Having said that, the total comes out to €37.65 (again, no shipping included) for building both boards :).
Final Thoughts #
As a closing note, split keyboards may not be for everyone. It takes some getting used to and the keymap may not always suit your needs.
For me, I liked how they looked and wanted to use one as a preventive measure for future injuries. I don’t have any injuries, that I know of, that could be caused by a regular keyboard, so I can’t really tell if there is any improvement on that aspect of having a split keyboard.
On the note of the key layout, I think I got used to it quite fast as I designed it with my hands in mind. The only thing that might’ve taken a bit longer was the thumb keys and switching between the layers and memorizing where everything is. Another point that I’d like to improve on any future designs that I make similar to this one is that, for me, the splay and column stagger on the pinky is proving to be a bit too much, as I can’t reach the Q and P sometimes without re-adjusting. I’d also bring the middle finger column a tick down.
All around, I’d say if you have the time and like the idea of having something custom made by you to fit your needs, then it will be an amazing experience to design, build and watch your own personal board come to life and using it on a daily basis. It might take some time to get used to the weird and different layout and the fact that your hands are both responsible for one half of a keyboard, but it will be worth it!
References #
Here are a few links that helped me with at least one step in the design and build.